Tuesday 13 December 2016

Claritystamp Challenge - Carol Singing and Christmas Joy


Surely one of the most joyous things at Christmas is decorating the Christmas tree, so my entry to the Claritystamp challenge is a sparkly bauble made by adapting the Filigraphy Hot Air balloon. I have made several of these in various colours.

Stamps:  Claritystamp Filigraphy Hot Air Balloon set, Snowflake
Inks:       Archival Black, Adirondack Stream
Other:     Promarker, black Sharpie and black fineliner, Ranger silver and gold Stickles 

NB. As I was batch making Christmas cards I cut my hot air balloon stamp as shown but I am sure if you have more time you could create the same image with careful masking. (The pieces still fit together to make the balloon)


  • Place the outer balloon mask, included in the set, onto your card.  Cover up the bottom section of the  balloon and then brush on the Adirondack Stream ink in a circular motion leaving a light section in the centre.
  • Remove the main mask but keep the small bit at the base. Stamp the balloon over the top using Archival black ink.
  • Remove the small mask and draw in the bottom of the bauble with a black  fineliner.  Any white areas can be coloured in with a coloured pencil.
  • Cut your card to size.  Cover the image with the balloon mask.  Lightly brush Stream ink around the edges and then stamp snowflakes around the outside. 2nd and 3rd generation ink.  Ink Blot Plot.

  • Now for the top of the bauble.  Stamp two of the balloon baskets with Archival black ink. (Photo shows  a batch)


  • Cut out as shown and use black fineliner to fill in the pattern on first one.

  • To finish off.  Edge card with Promarker in matching colour and then a black Sharpie.
  • Stick top of bauble bits on adding a gold thread through the loop.
  • Using Ranger Stickles add silver glitter to bauble and gold glitter to the top.
  • Mount image onto card blank. 

If I get time later this week, I will blog some of the other Christmas cards that I have made this year but just in case I don't

Happy Christmas

Lesley x


Tuesday 29 November 2016

Claritystamp Challenge - Blast from the past

It's been a while since my last post.  I stepped down from the Claritystamp Challenge Design Team in September so there was no card from me last month.  However I have just managed to complete a card in time for this month's Challenge and I hope it is OK to go back to becoming an entrant to the Challenge.  Last year there was a Challenge to use stencils and as I don't use these as much as I should I thought I would have another go at that Challenge. I must admit to having a lot of the club stencils unused, still in their wrappers. 

Stencil:  NDCS #20 Love tree 
Inks:     Adirondack Red Pepper and Butterscotch
Other:   Gelli Plate and Mega mount, black pen

  • Mount your 6x6" Gelli plate onto it's Mega mount.  This really does make it easier to use.
  • Using a brayer spread Red Pepper ink onto top half of the plate and Butterscotch onto the bottom half.  They will merge a bit in the centre.  
  • Place the stencil onto some paper, or in my case a page in my sketchbook, then place the Gelli plate down on top.  I have cleaned my brayer onto this page as well.  This bit isn't needed now but I will develop it sometime. 
  • Remove the stencil from the Gelli Plate and there will be ink left on the plate where the stencil was.  This is the bit I want.
  • Place the Gelli plate onto some card and press down to take the print.

  • Not sure why I got the blobs, maybe too much ink, but I will work with them.
  • Now just take a black pen and doodle around the image.  I added some extra hearts where there were blobs.
  • Darken the colours behind the tree with colouring pencils to make it stand out more.
  • Mount onto black card then a card blank.

Lesley x


Thursday 15 September 2016

Claritystamp Challenge - In the Garden #2


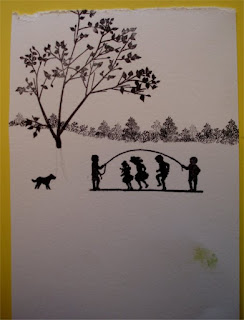
Another example card for this month's Claritystamp Challenge 'In the Garden'.  I had a special 'Summer' birthday this year as my December 23rd birthday was eclipsed last year by the birth of my granddaughter on Christmas Eve.  So this card is for all those born in Winter who would love to have a Summer birthday. 

Stamps: Claritystamp Branch from Fly Away set,  Skipping, NDC#21 Tree, NDC#? Summer, Happy Birthday 
Inks:      Archival black, Brushos
Other:    Masking Gum, black pen, colouring pencils, gold pen


  • Using black Archival ink, stamp the branch, this will later become a tree.
  • Stamp the children separately from the dog.  I did this by using masking tape on the bit I didn't want to stamp, inking up and then removing the tape before stamping. 
  • Tear a strip of copier paper and use this and the tree stamp at different angles to make the distant trees and bushes.
  • If you look closely you will see where I have drawn the trunk in lightly with pencil to help me position the other stamps.


  • Add dots of masking gum by putting some on a paintbrush and then gently flicking.  Larger dots at the front.  Let this dry while you are washing your paintbrush out.
  • Mix up a small amount of blue and green Brushos by adding water to the granuals.
  • Dampen the card above the bushes line and then drop in some blue at the top and let it merge down the card. Dry with a heatgun if you are impatient. 
  • Dampen the grass area and drop in the green, more at the bottom this time. Wait for it to dry or use a heatgun.


  • Sprinkle on some green and yellow Brushos where you want leaves and then very lightly spritz with water.
  • Use a brush to move some of the ink around until you are happy with the effect.
  • Remove the masking gum.


  • Finishing touches. With a black pen add the tree truck, some extra branches on the tree and some grass under the dog and children.
  • Use colouring pencils add further shading and some blades of grass at the front.  Add yellow in the centre of the daisies and some colouring on the children.
  • Stamp 'Summer' and 'Birthday, colour in with gold pen.  (I have cut my 'Happy Birthday' stamp into separate words.)
  • Trim, edge with a black Sharpie pen and then mount on yellow card before putting onto a blank card.

Hope you like this and it inspires you to have a go at the Challenge.  There are so many different Claritystamp stamps that could be used for this theme.

Lesley x


Thursday 1 September 2016

Claritystamp Challenge - In the Garden


Sorry that I did not get time to produce a card for the last challenge.  Our house move went well and we have settled in now.  The new craft room, in an outbuilding, is all set up and neat and tidy.  The trouble is I don't know where anything is anymore!  Managed to get an afternoon on my own last week and made this card, my first since moving in early July.

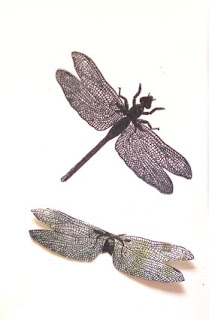
Stamps: Claritystamp NDC#101 Agapanthus, Large Dragonfly
Inks:      Alcohol inks, Black Archival
Other:    Claritystamp Card


  • I started out wanting to have a play with some alcohol inks and the Clarity coated white card but I could not find where I had put my inks.  I did, however, find some previous examples, so decided to use one of these.  The ink has been dripped onto an applicator and them randomly dotted over the card.  Alcohol inks work so well on the Clarity card.
  • Stamp the Agapanthus over the splodges of colour using an Archival black ink.  It is better to use second generation ink on Clarity card as otherwise it can slip. I forgot this and my first stamp, at the bottom, was blurry. I also dropped the ink pad onto the card which you can also see.  Never mind, it will be cut off later.

  • Colour in the flowers using water-based pens. I used two colours to match the background.

  • Stamp the dragonfly onto a piece of the alcohol inked background paper and cut out the wings.
  • Stamp the dragonfly again onto a square piece of card.

  • Trim the background and edge this and the Dragonfly with a Sharpie pen.
  • Attach the second pair of wings and shape to add dimension.


  • Finally mount onto a blank card.
  • Tried this way first .....

  • ... but decided I liked it better like this.

A simple design, but it got me back into the swing of things after a few weeks crafting break.  Looking forward to seeing all your entries.

Lesley x


Saturday 27 August 2016

Art Class - Black and White Rose


The design for this Acrylic painting started out in my sketchbook as a design for a lino cut to make into greetings cards.  It reminded me of a painting by Edward Middleditch that I had seen at an exhibition at Norwich Castle Museum many years ago.  I just had to have a go at a painting.

Edward Middleditch 
Unlike Middleditch, I kept my painting as stark black and white with no grey shading as I liked the contrast. I used some digital prints of my painting for making some greetings cards.

card 1
card 2
I prefer the cropped square version of the card and I think I will use this shape when I design the lino cut. Which do you prefer?

Lesley x


Friday 1 July 2016

Claritystamp Challenge - A day out


Another month goes by.  Can it really be July.  Hopefully I will be able to update you on our move soon. This month's Claritystamp challenge is "A day out" and what better than a drive in the countryside.  I am sure Santa won't mind me adapting his vintage car.

Stamps: Santa's car NDC#97, Tree branch from Fly away, Grasses 2 and 3, Small 3 trees
Inks:     Adirondack, Peach Bellini, Lettuce and Stonewashed, Archival Black
Other:   Spectrum Noir pencils, Black pen, Pebeo Drawing Gum

I did remember to take photos en route but some appear on my camera but not when I put the card in the computer and the ones that do are decidedly blurry but I'm sure you will get the idea. 


  • To get Santa's car without the Christmas tree, cover the tree with some masking tape, ink up with black, remove the tape and then stamp onto your card.

  • The missing lines will be drawn in later with pen but for now just lightly pencil them in. (On my first attempt I found the masking fluid and the pen blended, not what I wanted)
  • Paint masking fluid over the car, but not the windows and allow to dry.  Rinse your brush immediately with water. 
car with blue masking fluid
  • Using some torn copier paper as a mask brush on the inks to create your landscape.
  • I used a cloud stencil in the sky but later trimmed this off.
  • Stamp the tree branches at the top and the grasses at the bottom.  First and second generation ink for the grasses.
  • Remove the masking fluid and colour in the car with pencils.

  • Trim the card and edge with a black Sharpie pen.
  • Stamp on some small trees to give perspective.
  • Emphasise the hills and road with pencils.
  • Draw in the interior of the car.  Probably too small to see but I added a couple of little faces peering out of the back window. (Pre seat belt regulations)  " Are we there yet?"

  • By this stage I had got inky finger marks on the front of my card blank so decided to make a matching background paper to cover it.
  • Using the same inks as on the card randomly splodge some ink onto a craft mat, lightly spray with water, and then place on some cling film and move around.
  • Remove the cling film and lay down some copier paper onto the ink.
  • OK result but too dark for this card so I placed the still inky clingfilm onto some card and I liked this much better.  Looks like dappled light shining through the leaves of a tree. Much greener in real life than the photo shows.
  • Cover the front of the card with the background card and then stick on the main picture.

Looking forward to all your entries this month.  Keep crafting.

Lesley x


Wednesday 15 June 2016

Claritystamp Challenge - Masculine #2


Not really masculine, but neutral, so I think it will be acceptable as my second Clarity card this month. Still in the process of trying to move house here so I have cheated a bit and used a Zentangle I did way back when I first got this stencil.  Think I can just about remember how to do it, but no step-by step photos for this one I'm afraid.  Hope it gives you some inspiration for your entry this month if you haven't already done one yet.

Stamps: Happy birthday from Line sentiments 1
Stencils: Whirlpool NDSC10
Inks:      Various Adirondack, Archival Black
Other:    Small Circle punch, Black pen, Sharpie pen


  • Using a pale yellow ink (sorry can't remember exact colours) brush through the stencil. Wipe clean the stencil with a dry cloth while still in place.  This helps emphasise the edges as well as cleaning the stencil.
  • Replace stencil in different position, flip over if you want to, and repeat with darker yellow ink.
  • Repeat last step again using a green ink.
  • Edge the whirls with a black pen, deciding where they go under and over each other.
  • Add Zentangle patterns to the whirls.
  • Crop and then cut into three pieces.
  • Edge with a Sharpie pen.
  • Mount on matching card.
  • Punch three small circles from waste bits and edge with Sharpie pen.
  • Stick on circles.
  • Stamp sentiment with archival black.
  • Mount on blank card.
Well that was a quick card but only because I had already done the stenciled background and Zentangle months ago and put it away in a draw.  Do have a go at this month's challenge if you can. I think we all need a bit of inspiration when it comes to designing masculine cards and your entries certainly inspire me.

Lesley x

Saturday 11 June 2016

Art Class - Fritillaria Collage


I based this collage on a drawing in my sketchbook of a Fritillaria.  The papers used are all mono prints I created with my Gelli Plate or the 'waste' from cleaning the brayer during the making of the prints.  I was going to continue adding little squares to the lower flower at home but Fran said it didn't need it and I am glad that I took her advice. Haven't done collage for a long time and really enjoyed it.

Sketchbook Pen and Ink drawing
Lesley x

PS Amber, if you are reading, this is your Fritillary and I have dug it up so you can have it when we move xxx


Wednesday 1 June 2016

Claritystamp Challenge - Masculine


This month's Claritystamp challenge is to design a masculine card.  Why is it that we find masculine cards more difficult?  Even shop bought cards for the boys seem to be stuck in the fishing, golfing, cars, football etc mode. 

My design for this month just evolved, at the start I had no plan whatsoever of where I was going.  My other half grunted approval at the finished card, so I think it worked out alright.

Stamps: Claritystamp Happy Birthday from Line sentiments 1, Man from Wee folk #1
Stencil:  NDSC #5 Torn Shapes
Inks:     Various colours of Adirondack, Archival Black
Other:   Stencils brushes, black pen

  • Using the stencil, brush on various coloured inks to make a random pattern for a background paper.

  • Outline the shapes with a black pen.
  • Colour in small intersections with a black pen.
  • At this stage I cut the paper in half and looked for inspiration.
  • I vaguely saw a sort of climbing frame so stamped a wee man looking very chuffed at himself. Look, no hands! (Memories of the two eldest grandsons at Pensthorpe adventure play area last month)

  • Then added the sentiment, slightly curved,  continuing the black lines with a pen to tie it onto the uprights.
  • Trimmed and mounted onto black and then lilac card. 


Can't wait to see what everyone is going to come up with for this Claritystamp Challenge.

Lesley x


Sunday 15 May 2016

Claritystamp Challenge - Anything Goes #2


I've been really busy here this month.  In the process of buying and selling a house, so forgive me if I have been a bit distracted.  This is my offering for the mid-month reminder for the Claritystamp Challenge Anything Goes.  No step-by-step photos for this one I'm afraid, but fairly straightforward.

Stamp: Claritystamp NDC #102 Alice
Stencil: NDSC #22 
Inks:     Archival Watering Can
Other:   Watercolour paper, masking fluid, Brushos, White sticky labels, Spectrum Noir pencils

  • Stamp Alice with Archival Watering Can ink onto watercolour paper.
  • Cover Alice with masking fluid and also use the fluid to make a sun.
  • When the masking fluid is fully dry, tape the stencil to the paper.
  • Sprinkle a very small amount of the Brushos onto the card. I tried to place the colours to make grass, leaves and sky.
  • Lightly spray with water. I sprayed a bit too much at the bottom and the colour ran under the stencil but I quite like the effect.
  • Lift the stencil off and dry the artwork with a heat gun or just leave to dry if you are more patient than me.
  • Remove the masking fluid.
  • I started colouring in her dress with watercolour markers.  Not a good idea as the Brushos re-activated and bled round the edges.  So I stamped Alice again on a label, coloured in the dress, this time with pencils, cut around the dress and stuck this over the one I had messed up.
  • Finish colouring Alice and the sun with pencils.  
  • Cut a circle in a blank card and stick the artwork behind this.
  • Finish off with some Faux stitching.
If you feel inspired to enter this month's challenge pop along to the Claritystamp Challenge blog.  Looking forward to all your entries.

Lesley x


Thursday 12 May 2016

Art Class - Rose lino-cut


Another example of a lino cut. I designed this from a photograph of a rose taken by my sister-in-law Sandra. She has a beautiful garden. 


This time I have gone for a simple one block print which I will print onto different papers or colour in by hand.


This one has been printed onto a scrap of paper used to clean my brayer during a Gelli-print session. 


Not a lino-print but a copy of my original design which I have doodled into. 

The great thing about lino-cuts is that once you have your block cut you can experiment and print as many times as you like in different colours, on different papers etc.  This is a small print approximately 11 x 11 cm designed to fit on a card blank. 

This blog was supposed to go out before the one about the rose painting.   Still trying to catch up and got myself a bit muddled. Never mind.

Lesley x