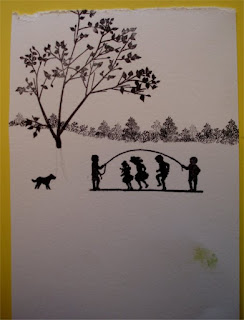
Another example card for this month's Claritystamp Challenge 'In the Garden'. I had a special 'Summer' birthday this year as my December 23rd birthday was eclipsed last year by the birth of my granddaughter on Christmas Eve. So this card is for all those born in Winter who would love to have a Summer birthday.
Stamps: Claritystamp Branch from Fly Away set, Skipping, NDC#21 Tree, NDC#? Summer, Happy Birthday
Inks: Archival black, Brushos
Other: Masking Gum, black pen, colouring pencils, gold pen
- Using black Archival ink, stamp the branch, this will later become a tree.
- Stamp the children separately from the dog. I did this by using masking tape on the bit I didn't want to stamp, inking up and then removing the tape before stamping.
- Tear a strip of copier paper and use this and the tree stamp at different angles to make the distant trees and bushes.
- If you look closely you will see where I have drawn the trunk in lightly with pencil to help me position the other stamps.
- Add dots of masking gum by putting some on a paintbrush and then gently flicking. Larger dots at the front. Let this dry while you are washing your paintbrush out.
- Mix up a small amount of blue and green Brushos by adding water to the granuals.
- Dampen the card above the bushes line and then drop in some blue at the top and let it merge down the card. Dry with a heatgun if you are impatient.
- Dampen the grass area and drop in the green, more at the bottom this time. Wait for it to dry or use a heatgun.
- Sprinkle on some green and yellow Brushos where you want leaves and then very lightly spritz with water.
- Use a brush to move some of the ink around until you are happy with the effect.
- Remove the masking gum.
- Finishing touches. With a black pen add the tree truck, some extra branches on the tree and some grass under the dog and children.
- Use colouring pencils add further shading and some blades of grass at the front. Add yellow in the centre of the daisies and some colouring on the children.
- Stamp 'Summer' and 'Birthday, colour in with gold pen. (I have cut my 'Happy Birthday' stamp into separate words.)
- Trim, edge with a black Sharpie pen and then mount on yellow card before putting onto a blank card.
Hope you like this and it inspires you to have a go at the Challenge. There are so many different Claritystamp stamps that could be used for this theme.
Lesley x


